
Also see the DR Overview post
How to!
I’m working with AOS 6.10-on-AHV in a nested environment. One 1 node cluster, one 3-node. Each with Prism Central. They are all on the same network (so it mimics a stretched network).
Since I have AHV-to-AHV I can’t do Metro/Synchronous/ 0min-RPO using Prism Element and since I have a freebie license I can’t do NearSync (1-15minRPO) so Async it is!
Step 1:
Add each site to the other as a Remote Site. You have to do it from the active site to the remote site, but you will want to setup the remote-to-active to test failback.
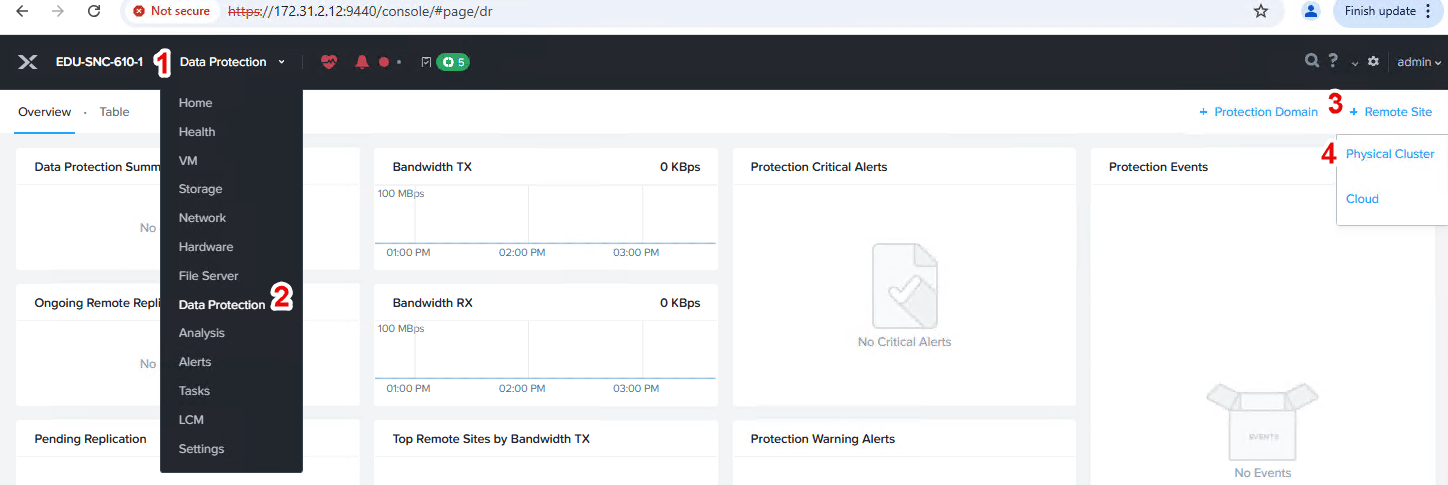
From each Prism Element interface. under the menu tab choose Data Protection then Remote Site then Physical Cluster
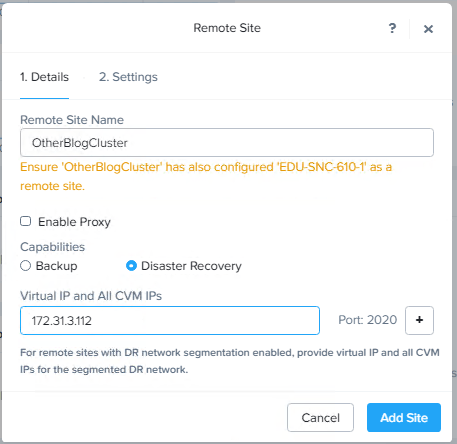
Name the site appropriately and enter the VIP of the cluster. Don’t worry about entering “All CVMs” – adding the site with the VIP populate all the CVMs appropriately and will remove the VIP.
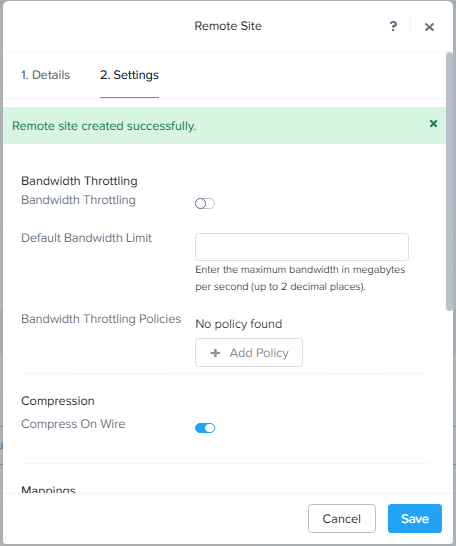
You can choose to set bandwidth throttling if you’d like.
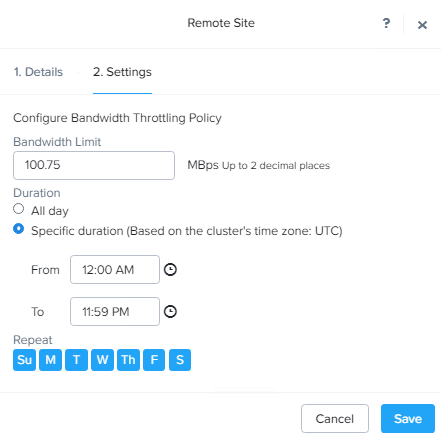
[Interestingly, “Policy” is usually a Prism Central construct. There are not a lot of “policies” to create in Prism Element]
Set mappings for any container or network whose names do not match between the clusters – best practice is to make mappings for any container or network you will be using, but the storage container at least will use the same name as the VM is created on – if the same name is found.
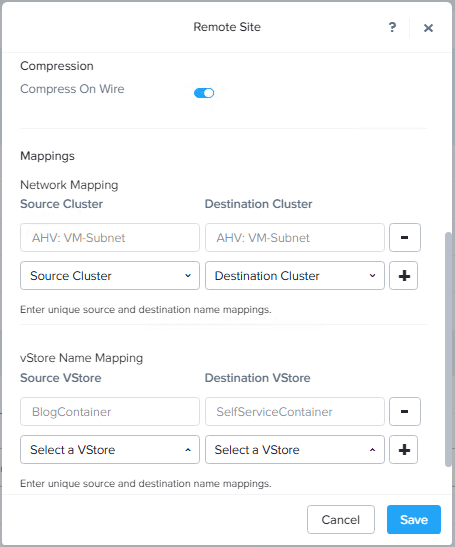
The Remote Site will be available in the Remote Site tab, and you can Update from there if mappings or Throttle Policy changes

Step 3:
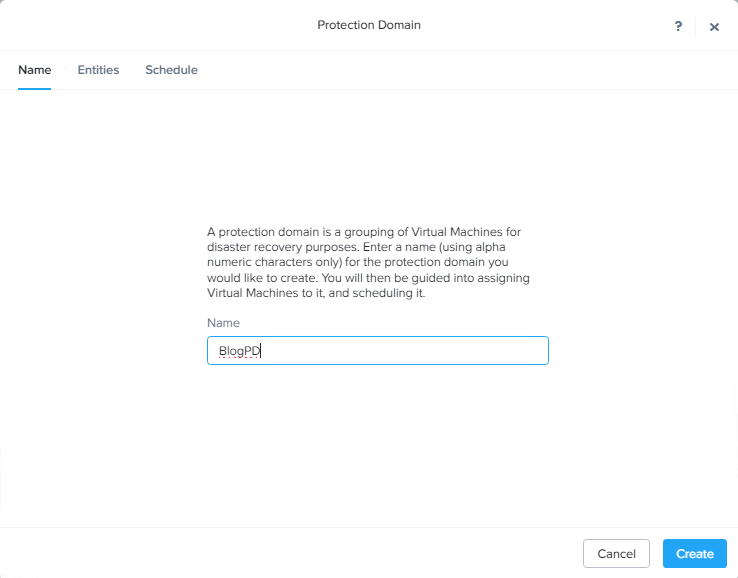
Create the Protection Domain. Click Async DR from the +Protection Domain menu option and provide a name
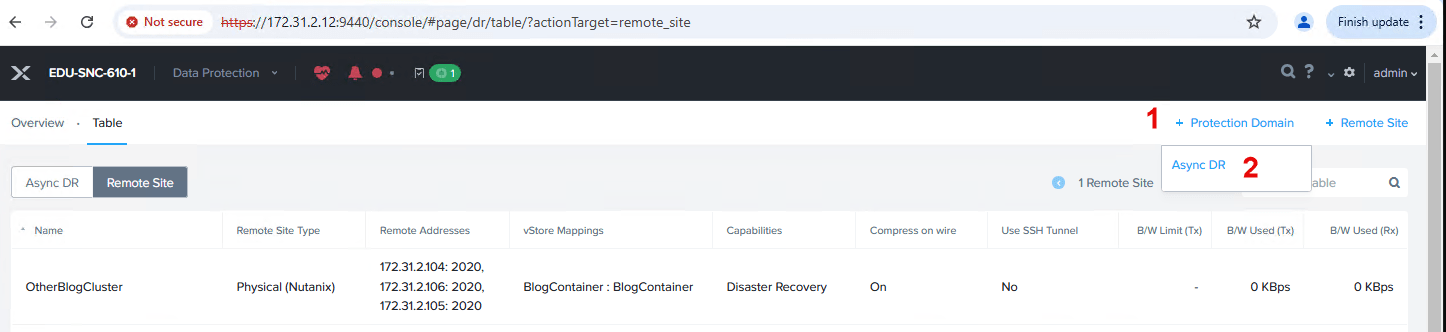
Now you need to pick the VMs or Volume Groups to protect. You can also group them into Consistency Groups which will ensure the VMs in the CG are snapshotted at the same time. You can also enable Application Consistent Snapshots for the CG (tho NGT will be required).
“Auto Protect related entities” is for multiple VMs deployed as one application from Self Service or shared resources like Volume Groups. If you have two VMs which are connected to the same VG, selecting just one VM and leaving “Auto Protect related entities” enabled will grab both VMs and the VG.
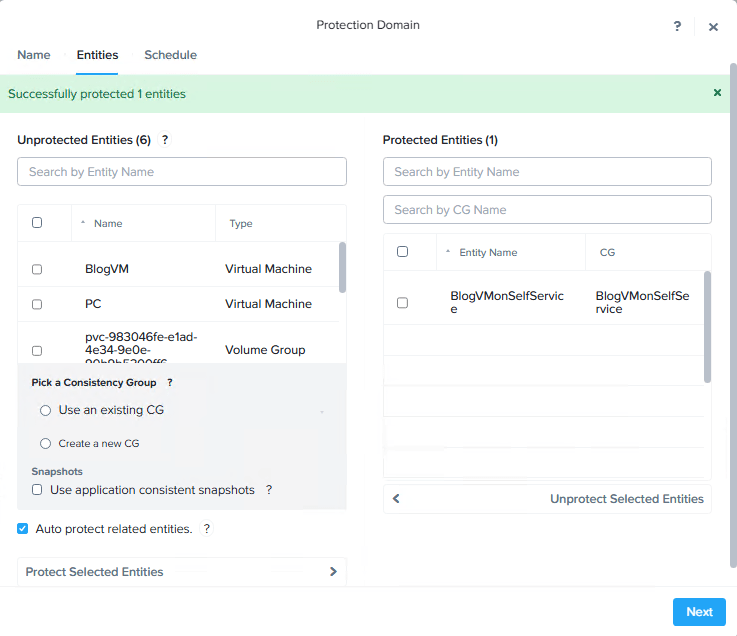
The entities selected will populate on the right.
Step 4:
Create the Schedule.
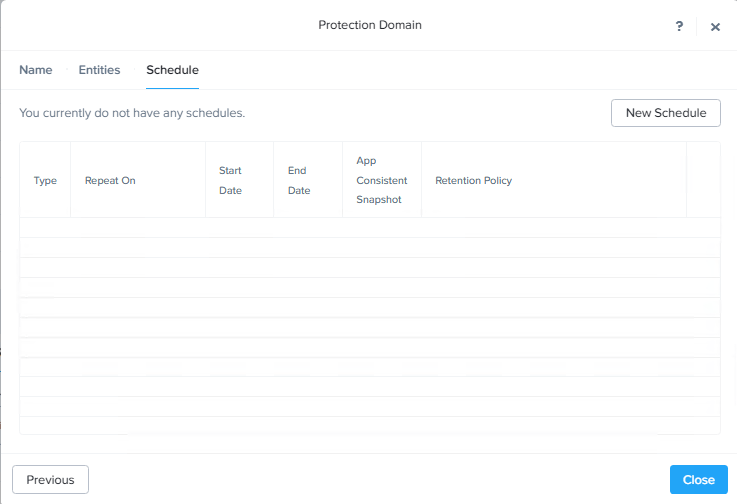
The third step of the PD creation is the schedule. No schedule = no replication.
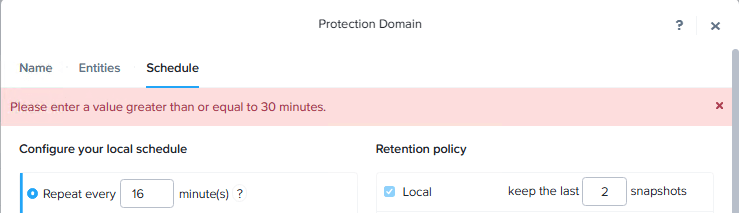
Your options are 1-15min (NearSync) or 60+ minutes (Async). Note that entries between 16 and 30 will give “Please enter a value greater than or equal to 30 minutes”
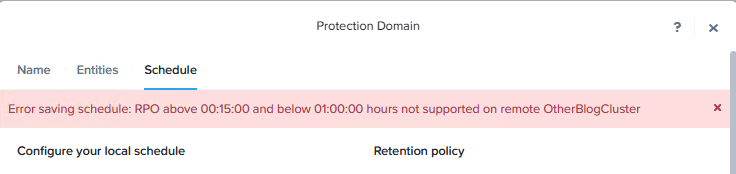
but entering 30-59 will give you “Error saving schedule: RPO above 00:15:00 and below 01:00:00 hours not supported on remote <remote site name>”
So maybe 16-30 works for a 3rd party tool? No idea. Even Cloud Connect and Cloud Cluster as remote sites have the same 1-55 and 60+ limits.
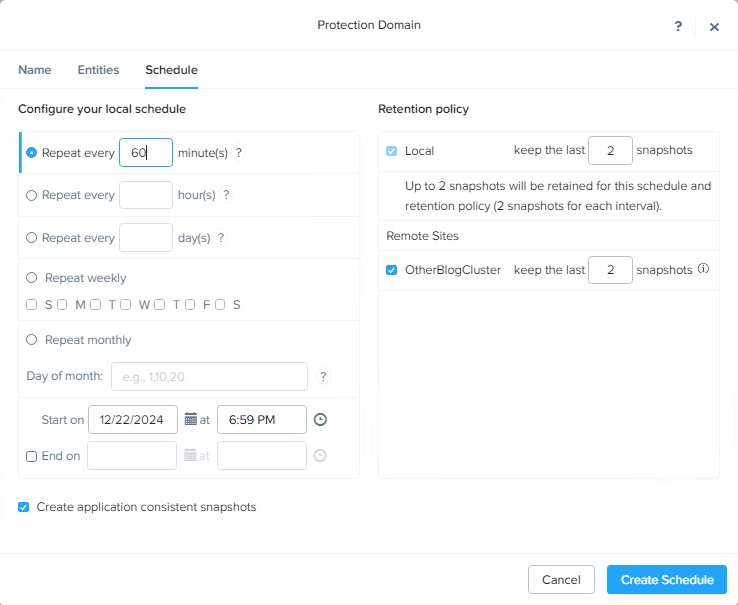
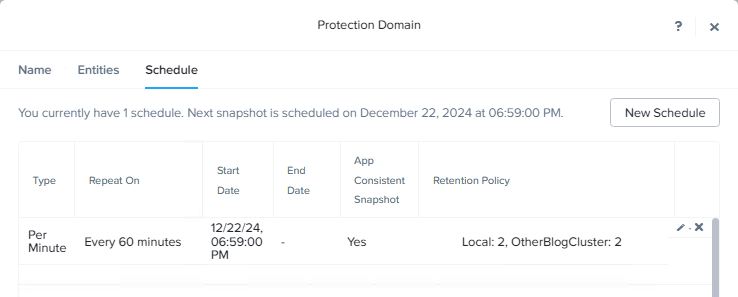
Anyway, set the time limity9ou deem appropriate and have the licensing for. Note you can specify how many local snapshot to keep – and the remote replication is an option. You can even set when it starts. And here we can set application consistent for the whole PD (instead of just the Consistency Group)
The Schedule tab will populate with the changes, and note you can have multiple schedules. And since you pick the remote site for each schedule, you can run one set of local copies, one set of copies to one DR site and one set of copies to Cloud Connect? Lots of options.
Step 5:
You can check the main Async DR table for an overview. I’m replicating a stable VM so there is not much going on.

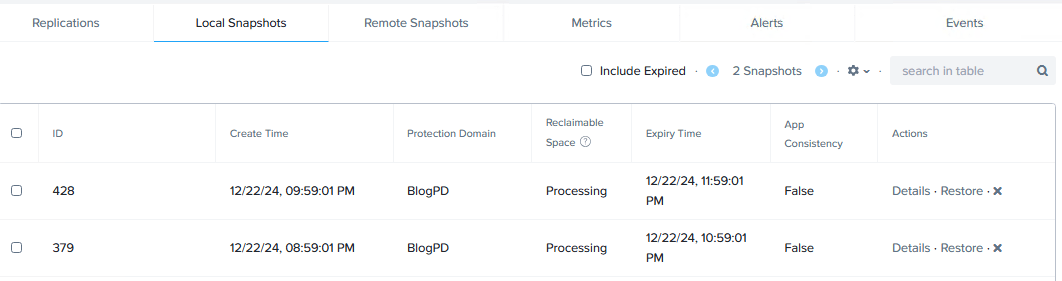
But down below you see the Local Snapshots
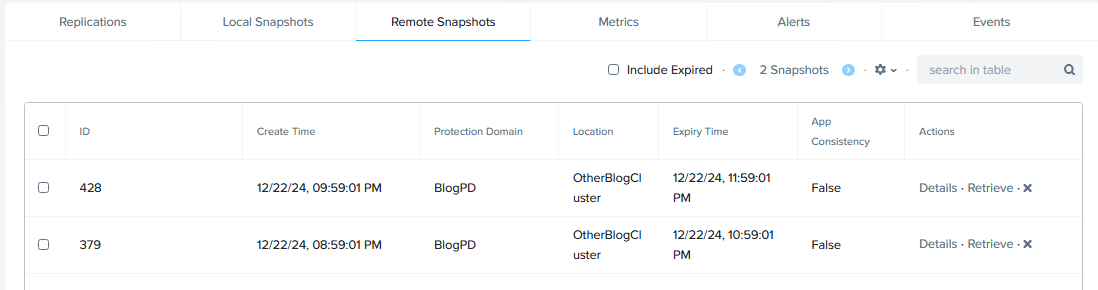
Remote Snapshots
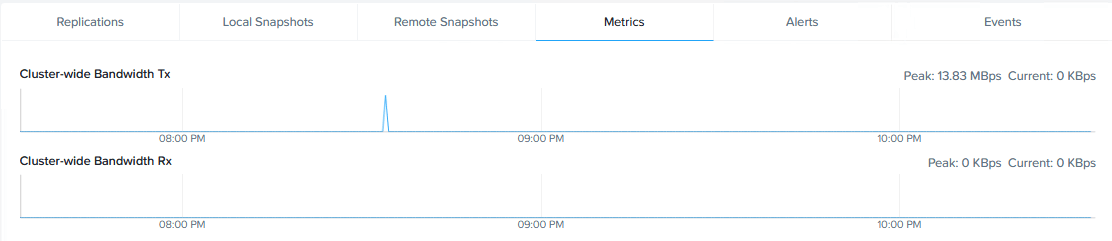
And a little of the metrics
Jumping to the remote site, you’ll notice it shows no Entities, because this is the remote site

It does show the Local and Remote snapshots (the inverse of what the active site is showing)
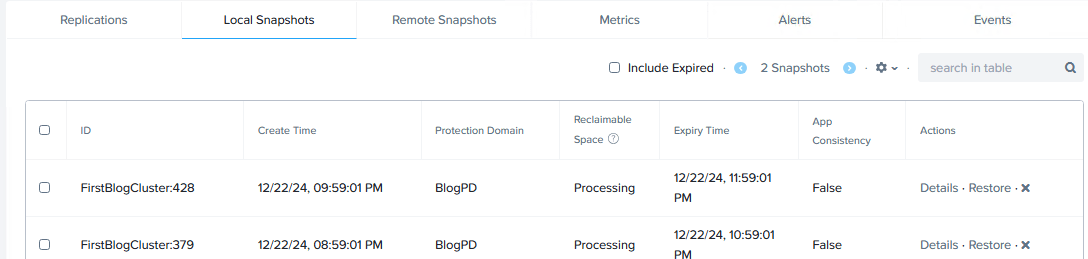
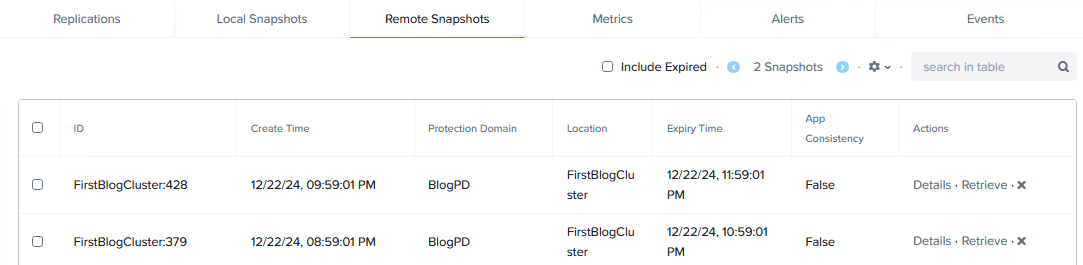
Note that Restore will use the snapshot to create a local clone of the VM, Retrieve will copy the remote snapshot to the local site and Reclaimable Space (which is still calculating in my environment) will show how much physical space would be reclaimed if you deleted the local snapshot.
